Showing posts with label recipes. Show all posts

Tuesday, April 22, 2014

Spiced Nuts

For my Chloe + Isabel party last week, I made some spiced nuts, and let me tell you something...  I don't want to toot my own horn, but I get a lot of compliments on my recipes.  My cupcakes get oohs and ahhhs, my pies have been referred to as "the best pie I've ever had" and my cookies and brownies are pretty darn good.  

But no recipe has ever garnered this much "Can I get your recipe" as these nuts did.  And they couldn't have been easier!  I think in total they took me 30 minutes... and I made about 6 cups of nuts, people.  

3 cups of nuts (I used Fisher's pecans, walnuts and almonds)
1 Egg White
2 Tablespoons Sugar
1/2 teaspoon Cinnamon
1/2 teaspoon Allspice
1/4 teaspoon Cayenne 

I started by toasting the nuts.  You can skip this step, but it gives it a crunchier nut, and I love the way toasting nuts smell.  To toast them, just put them on a cookie sheet and put them in a 350 degree oven for 10-15 minutes.  Make sure to check them after 10 minutes, burnt nuts aren't any fun.  


Whip the egg white until it starts to foam and then add the sugar slowly.  Whip until stiff peaks form.

Fold in the cinnamon, allspice and cayenne, and then fold in the toasted nuts.


Lay the nuts back out on your GREASED cookie sheet, and bake for 5 minutes at 350.  Then, flip the nuts over and bake another 5 minutes.


Remove the nuts and put them on a rack to cool.  They will harden as they cool.


Put the nuts in a tupperware and shake, shake, shake!  Just enough to break the big clumps apart.  Serve, or store for a week in a cool, dry place.


Be careful, these are addicting!!

Don't forget about the big C+I sale!  25% off your order of $100 or more.  Just click here to check out the merch.


Monday, March 17, 2014

Two For One: Ginger Garlic Chicken with Roasted Veggies

I generally make enough food for an army... and then by the time I get done eating it I never want to see it again.  So a recipe that I can eat in a few different ways will go a long ways with my patience. 

This recipe was a simple concept kicked up with some flava flav. 

Ginger Garlic Chicken with Roasted Veggies
1 Chicken Breast
2 Cups Cooked Brown Rice
A big pan of roasted vegetables
-1 Sweet potatoes
-1 Onion
-1 Summer Squash
-3 Carrots
1 Tbsp Asian Sesame Salad Dressing
Grated Ginger
Minced Garlic

I marinated the Chicken Breast in Asian Sesame Dressing, about a teaspoon of grated ginger and one minced garlic clove and a drizzle of olive oil for 30 minutes while I prepped my veggies to roast.

The roasted veggies were topped with some more olive oil, grated ginger and minced garlic, salt and pepper and roasted in a 400 degree oven until they were soft in the middle and brown on the outside.  Half of the sweet potato ended up disappearing into my mouth.  IMO, roasted sweet potato is a gift from God. 

While the veggies cooked, I sauteed the chicken until it was cooked through and had a pretty brown crust on the outside.  (As a note, if I was having this for dinner, I would have cooked up two chicken breasts since it's being split in two, but the fact is, I only had one in the fridge, so that's what I used and I was happy eating a few more veggies to fill me up). 

The end result was a beautiful plate topped with a little fresh grated Parmesan cheese.


BUT WAIT! There's more! 

I knew I was going to have plenty of leftovers, so I added an egg and a tablespoon of soy sauce (a little goes a long way) and sauteed up some fried rice!  Topped with cilantro... yum.


Leftover fried rice is bananas... I took a bite of it just to make sure all the flavors were there, and I got really excited for dinner. 

I actually had planned on grabbing something from Subway or some sushi to relax after work and watch the ISU game, but now, I'm just going to destroy these leftovers.  Go State! 

Monday, March 10, 2014

Easy Thai Chicken Salad

Dinner tonight was done in 10 minutes...

Do I have your attention?

I had been looking for a way to use a bag of coleslaw mix I bought the other day to top my fish tacos.  I feel like they should sell smaller bags of coleslaw mix, but I digress.  I found this recipe for a chopped Thai Chicken Salad and I couldn't resist makingt a few easy substitutions.  It ended up easier than I even thought it would be! 

Easy Thai Chicken Salad
Ingredients:
1/2 bag coleslaw mix (just the chopped cabbage and carrots bag, pre mayo)
2 chicken breasts
2 green onions
1 snack-sized bag of peanuts (chopped)
Handfull of chopped cilantro
1 Cup Wonton Strips (I love these)
Asian Sesame Dressing to taste

I slapped the chicken on the Foreman Grill (it's getting so nice out, if I had a grill, I would have grilled them outside!) and set to mix up the other ingredients.

I threw everything in a bowl and mixed it all up.  Once the chicken was done, I let it cool off for a bit so it wouldn't wilt my slaw and chopped it up into the salad.

Voila! Dinner was that easy.  And I had plenty of leftovers for lunch tomorrow!  I will note, saving the wonton strips for right before you serve is generally a good idea.  They get a little soggy.

Thursday, May 3, 2012

Tamale Casserole Twice Adapted

I pinned a recipe for Tamale Casserole a long time ago, and I just recently clicked through it and found out it was from espressoandcream.com!  Espresso And Cream is a blog I read all the time, from a fellow Des Moines girl.  I love when that happens.

Anyway, I got all the ingredients and whipped it up today, and I have to say... YUM! 

Tamales are one of my favorite foods.  I've always been intimidated to give them a shot because someone told me it was useless unless you had a small Latino lady holding your hand. 

This recipe was quick and easy.  I used my George Foreman to cook up the chicken and shredded it.  Mixed it with the green chiles for the first layer. 


The second layer was the cornbread mixture.  Love me some Jiffy Corn Bread mix.  I make pancakes from it ALL THE TIME.  Favorite! 


The final layer came after it cooked for 15 minutes or so.  I pricked the top with a fork so the enchilada sauce could soak in. I only used about 1/2 the can.  And then sprinkled 1/4 cup of the cheese over the top.  Nom. 

So I adapted Madison's recipe that she adapted from Cooking Light.  I used far less enchilada sauce, because I just don't like it that much.  And I tucked the shredded chicken and green chiles under the corn bread goodness.  Not sure if the sour cream was for garnish, or what. But I just didn't bother. 

Tamale Casserole (Cooking Light version with a few edits)

Ingredients

  • 1/2 cup (2 ounces) preshredded 4-cheese Mexican blend cheese, divided
  • 1/3 cup fat-free milk 
  • 1 egg
  • 1 teaspoon ground cumin
  • 1/8 teaspoon cayenne 
  • 1 (14 3/4-ounce) can cream-style corn
  • 1 (8.5-ounce) box corn muffin mix (I used Jiffy)
  • 1 (4-ounce) can chopped green chiles
  • Cooking spray
  • 1/2 (10-ounce) can red enchilada sauce 
  • 2 cups shredded cooked chicken breast 

Preparation

  1. Preheat oven to 400°.
  2. Combine Chicken with Green Chiles and spread out on a 13 x 9-inch baking dish coated with cooking spray.
  3. Combine 1/4 cup cheese and next 7 ingredients (through chiles) in a large bowl, stirring just until moist. Pour mixture over chicken mixture.
  4. Bake at 400° for 15 minutes or until set. Pierce entire surface liberally with a fork; pour enchilada sauce over top. Sprinkle with remaining 1/2 cup cheese. Bake at 400° for 15 minutes or until cheese melts. Remove from oven; let stand 5 minutes. Serves 8.

Tuesday, April 3, 2012

Macarons. Go ahead, Trebek it, I'll wait.

I heard that making a french macaron was very difficult... So I didn't do it.  

Years after they were "all the rage" I decided to give them a try, and I'll tell you why.  I like to try and make food when I have ZERO ingredients for the food I want to make.  Making cookies is always something I want to do when I have NO FLOUR.  

So I was sifting (baking humor) through my ingredients to see what sort of flour-less cookies I could make when I stumbled upon a bag of almonds.  Now, I'm not going to lie... I could have made my life WAY easier by buying almond meal and superfine sugar, but what's the fun in that? So I literally ground the almonds down to flour in my food processor and sifted them 3 times, just to make sure. Then I gave my sugar a spin in the processor to make it "supa fine" like me.  

The finished result was an incredibly fragile shell with NO LEGS.  Legs on a 'ron is the non-smooth area at the base of the cookie.  Where it rises. You want legs...

Instead, mine rose in cracks all over the place, but once it's in your mouth, you can't taste the difference.  
Forgive my horrible photography... I try to get creative and it gets bad.

I put some plain ol' frosting in the middle.  Nothing special.  Packed them up for my Aunt Linda's birthday.  

*Word to the wise:  write "fragile" on the box... she reached her hand right in there and crushed the poor macarons.  

French Macarons 
Recipe by THE Martha Stewart
  • Yield Makes 35 macarons

Ingredients

  • For the Macarons

    • 1 cup confectioners' sugar
    • 3/4 cup almond flour
    • 2 large egg whites, room temperature
    • Pinch of cream of tartar
    • 1/4 cup superfine sugar

Directions

  1. Pulse confectioners' sugar and almond flour in a food processor until combined. Sift mixture 2 times.
  2. Preheat oven to 375 degrees. Whisk whites with a mixer on medium speed until foamy. Add cream of tartar, and whisk until soft peaks form. Reduce speed to low, then add superfine sugar. Increase speed to high, and whisk until stiff peaks form, about 8 minutes. Sift flour mixture over whites, and fold until mixture is smooth and shiny.
  3. Transfer batter to a pastry bag fitted with a 1/2-inch plain round tip, and pipe 3/4-inch rounds 1 inch apart on parchment-lined baking sheets, dragging pastry tip to the side of rounds rather than forming peaks. Tap bottom of each sheet on work surface to release trapped air. Let stand at room temperature for 15 minutes. Reduce oven temperature to 325 degrees. Bake 1 sheet at a time, rotating halfway through, until macarons are crisp and firm, about 10 minutes. After each batch, increase oven temperature to 375 degrees, heat for 5 minutes, then reduce to 325 degrees.
  4. Let macarons cool on sheets for 2 to 3 minutes, then transfer to a wire rack. (If macarons stick, spray water underneath parchment on hot sheet. The steam will help release macarons.)
  5. Sandwich 2 same-size macarons with 1 teaspoon filling. Serve immediately, or stack between layers of parchment, wrap in plastic, and freeze for up to 3 months.

Cook's Note

Piping the perfect macaroon takes a little practice. Treat it as you would a rosette, bringing the pastry tip to the side of the circle, rather than forming a peak, to finish.

Thursday, March 1, 2012

New Food Processor... Cashew Butter and Banana Ice Cream

I got a new food processor with my sweet Target gift card! (Thanks Danielle)

So tonight I was leaving work and I had 3 choices:
1. Random box of cheesecake in the work fridge that I'm pretty sure was for someone's birthday
2. Shamrock Shake
3. Make stuff with my food processor.

I chose the cheesecake.  obvi.  So I opened the fridge and it was GONE!  UGH.

So I started to drive toward my apartment.  I didn't choose to turn into my driveway until I was RIGHT in front of my place.  Alas... I knew a shamrock shake would upset my tummy right before bed.  I still haven't had one this year!

It took about 20 minutes to figure the dang thing out.  But when I finally did... oh buddy!


I started with some simple cashew butter.
2 cups cashews
2-3 T vegi oil
a squeeze or two of the honey bear


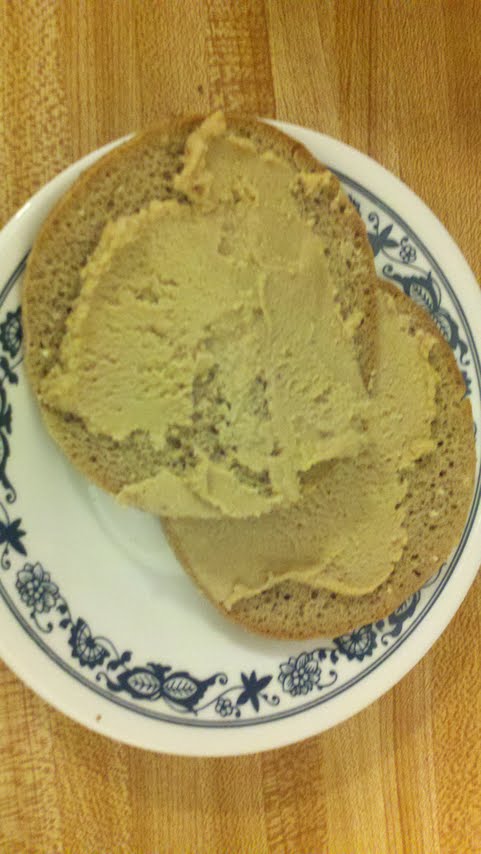
Processed it all up and look how delicious it is!  Yum.

Then I moved on an Iowa Girl Eats recipe: One Ingredient Banana Ice Cream


Guess what the ingredient is...


I'm not a huge fan of this recipe. 
I felt like maybe the bananas were in the freezer for too long... but then I realized I just don't like bananas.

Tuesday, January 24, 2012

Granola Bars That Taste Ah-MAZING

I have made countless failed attempts at chewy granola bars.  I spend a lot of money on granola bars, and I would love to know exactly what's going into them... but I could never find the right combo of ingredients I wanted to consume and taste.  

I only had to pick up one ingredient for these... it was a trail mix of fruit, nuts, and chocolate chips.  I call that "more bang for your buck".  
One major problem... these are SO good. I could eat the whole batch. 
Ingredients:
  • Granola cereal, 1 cup (Thanks to my mom, I had some delicious mom-made granola.)
  • Rolled Oats, 1 cup
  • Good Sense Trail Mix Caramel Nut Delite, 1 cup (or another fruit/nut mix)
  • Flour, white, 1/2 cup
  • Egg, fresh, 1 large
  • Brown Sugar, 3 tbsp packed
  • Vegetable Oil, 3 tbsp
  • Honey, 3 tbsp
  • Cinnamon, ground, 1/4 tsp
Mix the granola, rolled oats, fruit/nut mix and flour together in a large bowl.  

In a separate bowl, mix the egg, brown sugar, vegetable oil, honey and cinnamon.  


Combine the wet and dry ingredients and spread out into a 8x8 pan.  Press the mixture down with your hands.  


Bake at 325F for 25-30 minutes. 

Makes 10

Nutrition Facts
Cals: 247.8
Fat: 13 g
Cholesterol: 18.5 mg
Sodium: 32.8 mg
Carbs: 28.9 g
Fiber: 2.9 g
Sugars: 13.7 g
Protein: 5.7 g


A few notes: 
-I found that trail mix for pretty cheep at Dahl's, so I used it instead of buying mixed nuts and dried fruit.  The nutrition facts reflect the change.  
-I loosely followed a recipe from some magazine I cut out months ago... Sorry, I can't remember which mag.  
-The recipe I loosely followed  said this made 18 servings, but the photo made them look about as big as the ones I cut. Take that for what it is.

Tuesday, January 17, 2012

Family Recipe: Blueberry Muffins

We used to make these muffins all the time when I was younger, so I'll consider this a family recipe. 


 I only had a few blueberries that I had frozen this summer, so I got into my frozen mixed berries and literally picked out the blueberries... My friends always joke that I would go to great lengths to make something even if I didn't have the ingredients.  

 Don't mix these bad boys too much or you'll have flat dense muffins.  Mine were perfectly fluffy and yummy.   

Don't mind that there is one muffin missing... It's always a crap shoot finding the right amount of batter to fill each cup to equal exactly 12, so I just filled the cups and let them fall as they pleased.  So it made 11.  Get over it.  

Basic Muffins

1 3/4 cups all-purpose flour
1/4 cup sugar
2 teaspoons baking powder
1/2 teaspoon salt
1 beaten egg
3/4 cup milk
1/3 cup cooking oil

Oven 400°

In a large mixing bowl stir together the flour, sugar, baking powder, and salt. make a well in the center. Combine egg, milk, and oil. Add egg mixture all at once to flour mixture. Stir just till moistened; batter should be lumpy. Grease muffin cups or line with paper bake cups; fill 2/3 full. Bake in 400° oven for 20 to 25 minutes or till golden. Remove from pans; serve warm. Makes 10-12 muffins.

Blueberry Muffins

Prepare Basic Muffins as above, except combine 3/4 cup fresh or frozen blueberries, thawed, and 2 tablespoons additional sugar. Carefully fold into batter.

Monday, January 16, 2012

Turkey Stuffed Cabbage Rolls

AKA one of my favorite foods!  

My roommate Allyson in New Orleans made this one time and I think I ate the leftovers for every meal for a week.   

You can put any seasonings in this.  I used basil, it called for parsley.  

 Get all of your separate parts and fill it up!
 Pack them into that pot you boiled the cabbage in...
 Cover with part cabbage boil water and part tomato spaghetti sauce and cook away.  Yummers!
Stuffed Cabbage Rolls
 
2 quarts water
1 large head of cabbage
2 tablespoons butter
1 large onion, chopped
1 clove garlic, minced
2 cups cooked brown rice
1 lb. ground turkey (or pork or beef)
salt and pepper
1 tablespoon dried parsley flakes
2 celery stalks, finely chopped
1 green pepper, finely chopped
4 cups tomato puree
 
1. Remove the center core of the cabbage. (Not as easy as it sounds) Boil 2 quarts of the water in a  stockpot that is not make of aluminum. Add the cabbage and cook for 2-3 minutes until the outer leaves are tender. Remove the outer elaves and continue cooking the rest, removing outer leaves and cooking the interior until all the leaves are cooked and removed. Reserve 2 cups of the cooking water.
 
2. Cut away the bottom of the center vein on each leaf. Place 4 large outer leaves at the bottom of the stockpot.
 
3. Melt the butter in a pan and add the onion and garlic, cooking until it is golden.
 
4. Mix onion/garlic misture in a bowl with ground meat, rice, salt, pepper, parsley, green pepper and celery.
 
5. Place 1/4 to 1/3 cup of the rice mixture on each cabbage leaf. To roll the leaves up, fold in the sides, then begin rolling from the bottom of the leaf, tucking the edge of the leaf under the finished roll. Place the rolled leaves in the stockpot.
 
6. Mix tomatoes and reserved cabbage water in a bowl. Pour enough into the stockpot to almost cover the cabbage. Bring to a boil, then reduce heat to low and cover and simmer for 1 hour until the cabbage is tender. Add more reserved tomato/water mix while cabbage cooks if the level drops too far.
 
Substitution: feel free to swap out a jar of spaghetti suace for the pureed tomatoes. (I did this because I've read bad things about canned tomatoes.  I generally try to avoid them in my own cooking.)